How to Style Shelves
Styling shelves is really both a science and an art. While I admit that some people have an eye for it and some just don’t, there are still tips & tricks that anyone can learn to improve the styling of their home! In this post, I go over my best tips on how to style shelves, and I hope it will provide some helpful insight!

Tuscany Main Floor Renovation by Marianne Elizabeth Design
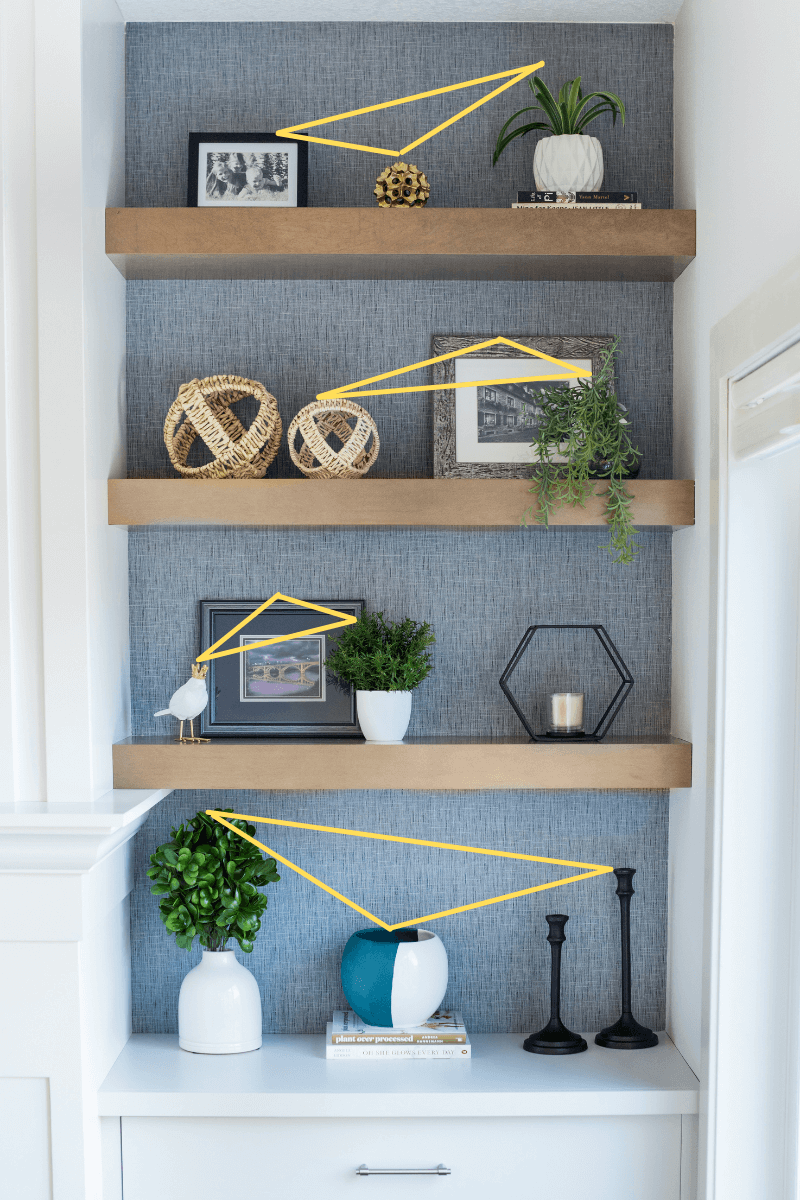
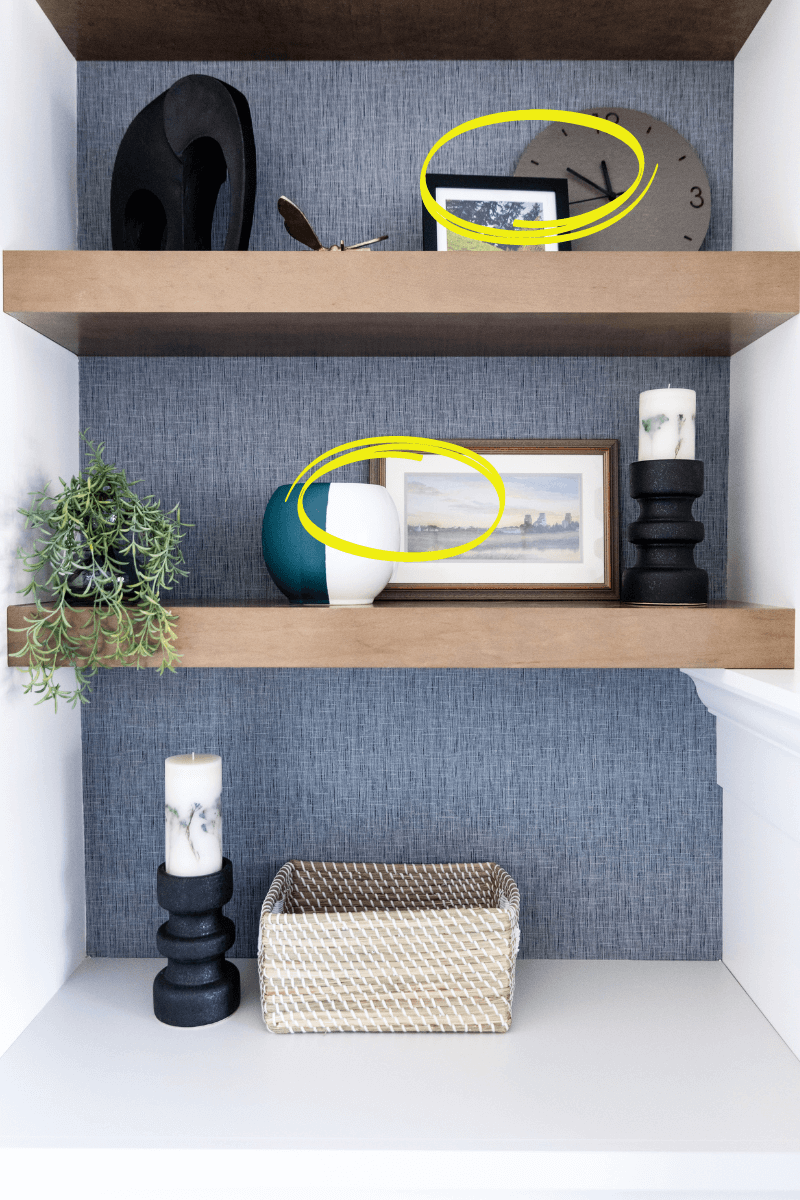
Tip #1 - Add varying heights
It’s important to add objects of varying heights on each shelf. When choosing what goes where, think about forming triangles with your items. The height of the objects should form an imaginary triangle if you were to trace the top points of each item. See the photo below for an example. You can see how each item in the triangle is a different height- tall, medium, and short.
Living room shelves from our Tuscany Main Floor Renovation
Tip #2 - Add varying textures
If you stand back and look at the shelves and think “something’s missing…” it may be that you haven’t incorporated enough texture! Think about fabrics, wood, metal, stone, shiny, dull, soft, rough, smooth, etc. If you have several wood pieces, think about what texture would be the opposite of that item and add that texture in (something smooth and shiny!).
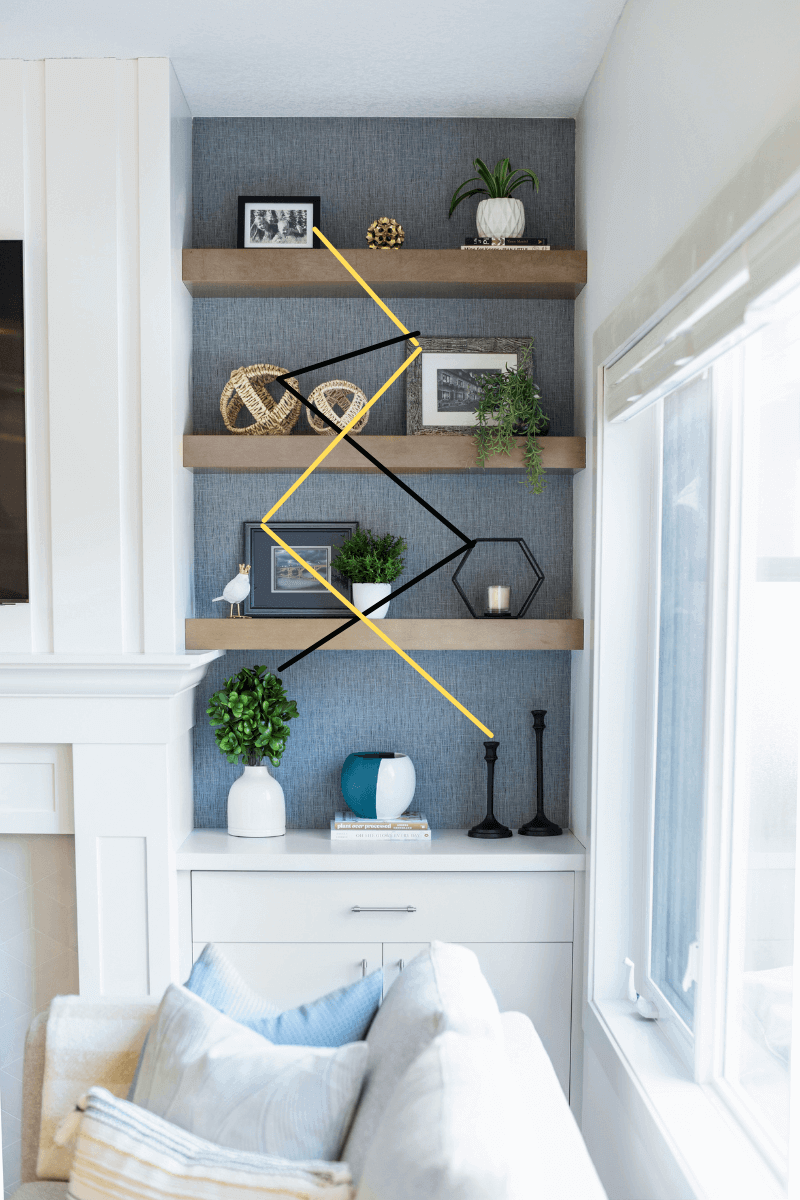
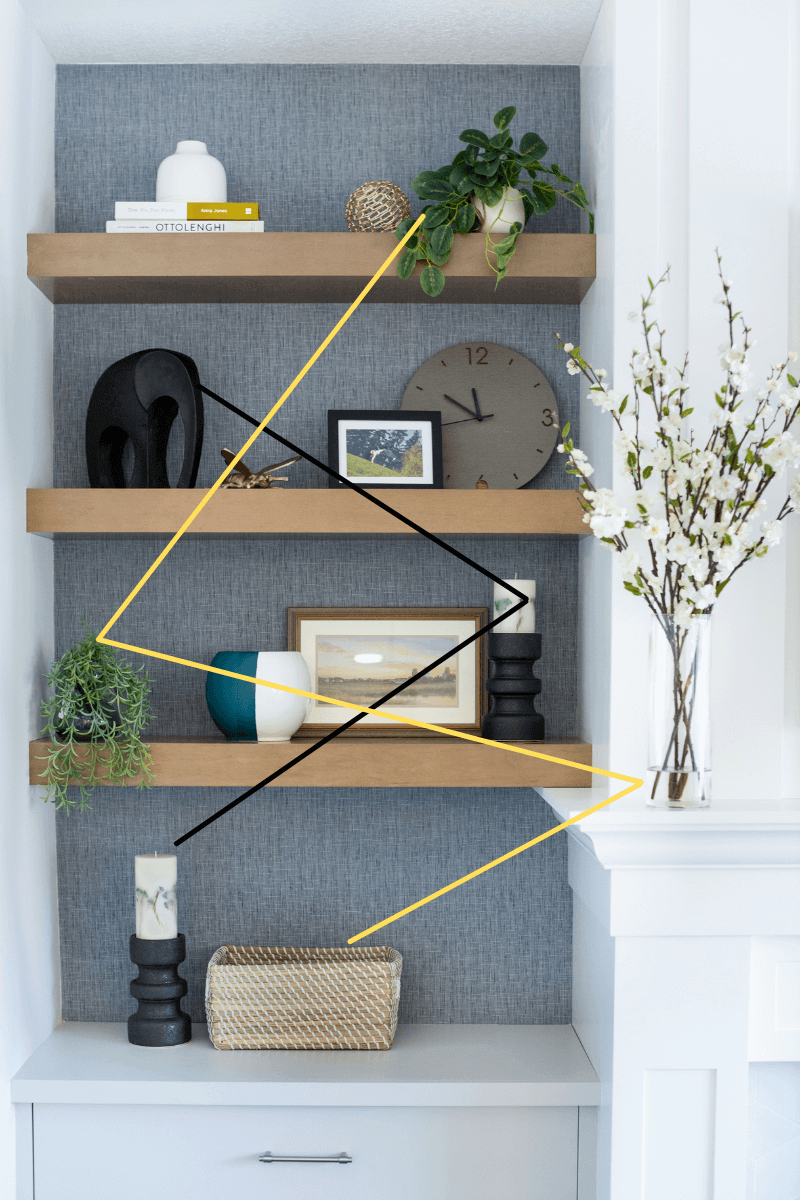
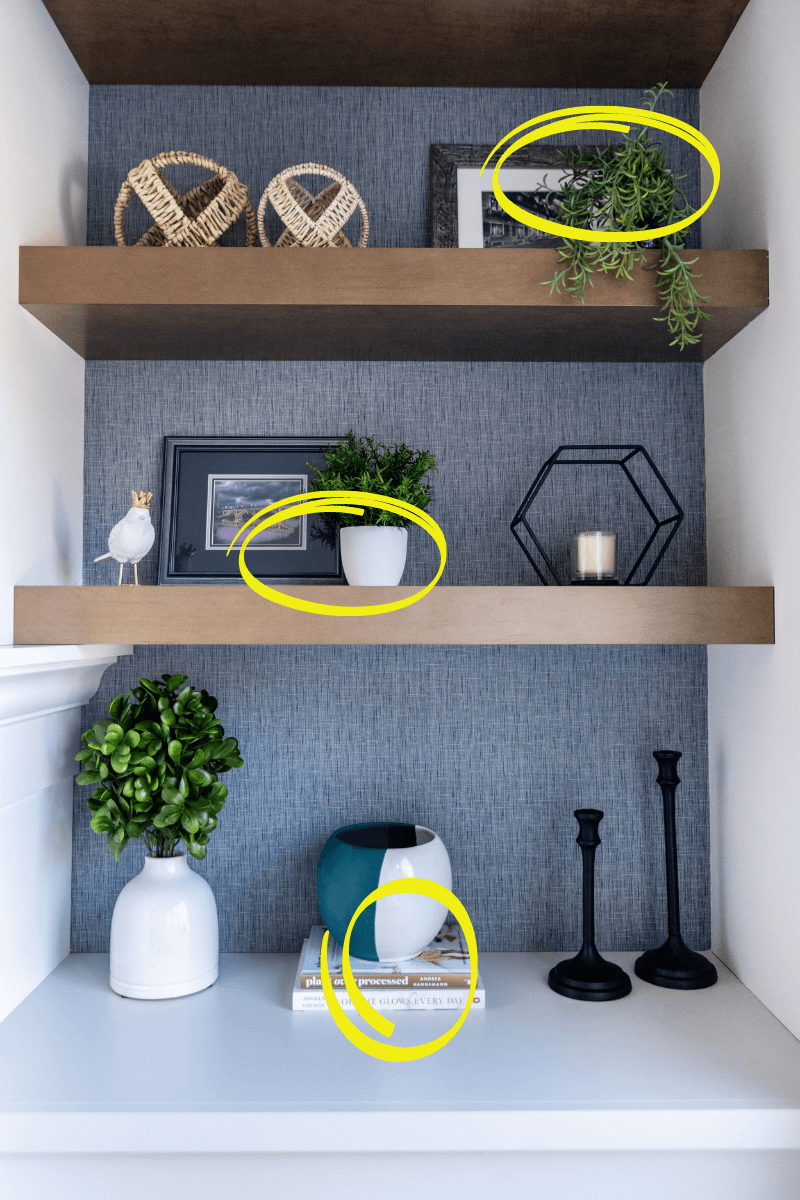
Tip #3 - Asymmetry, symmetry, & balance
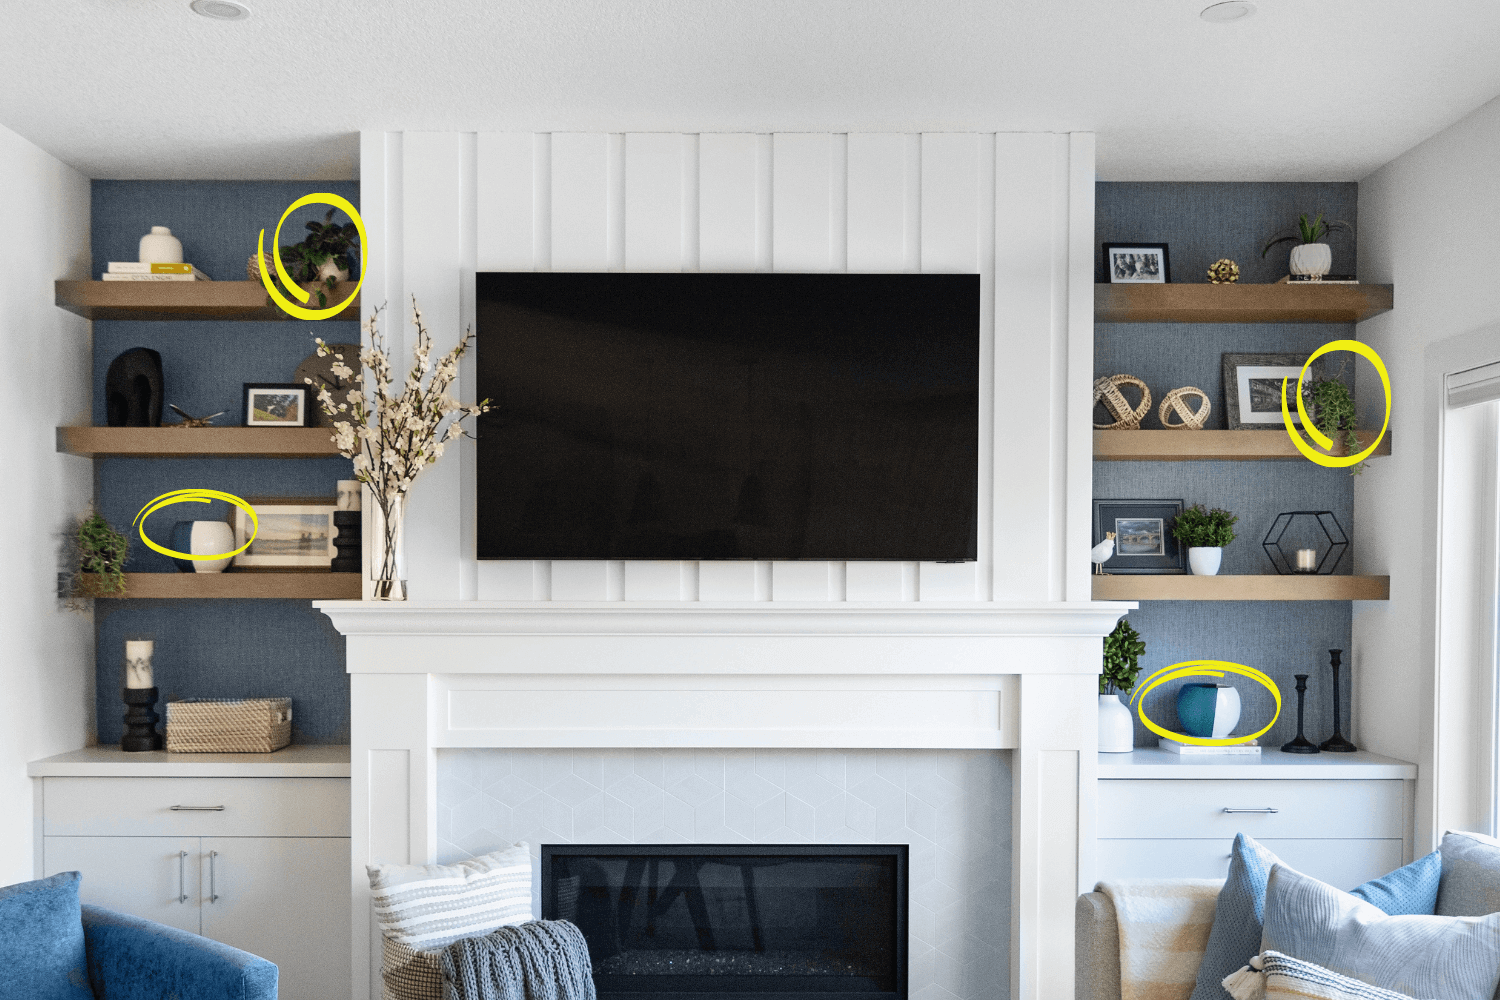
If styling shelves on two sides of an object (like shelves on either side of a fireplace), you want to incorporate both asymmetry and symmetry. Objects placed in an asymmetrical way are often more interesting to the eye than perfect symmetry. But by incorporating some symmetry, you can create balance between the sides. For example, have some symmetry by using two of the same vases, one on each side, but use asymmetry by placing them in different spots on each side rather than mirroring each other in perfect symmetry. This applies to almost any other object you may be using. For example, plants make fantastic items to add to shelves, and you’ll want to have plants on both sides of the shelving, which provides some symmetry and balance. But don’t place them in the exact same spot on the shelves- stagger them in an asymmetrical way. Think about creating a “Z” shape with the items or a zig-zag- this helps provide balance! Check out our example below.
Tip #4 - Cohesive colour scheme
To keep your shelves looking cohesive, you’ll want to have a colour scheme. That colour scheme could be just neutrals- with woods, black, and greenery- or it could be neutrals plus pops of orange. Whatever your chosen colour scheme, there should be “pops” of it throughout the shelves in an asymmetrical, but symmetrical, way (like described above).
Tip #5 - Vary size & shapes
You’ll want to add items of different shapes and sizes. It’s important to add several large items along with some smaller ones, rather than having a whole bunch of small items. Using only small items will make the shelves look cluttered and not thought-out. With shapes, think about it in the same way as texture. You’ll want some items to be opposites of each other in their shape. For example, a round ball with a tall skinny candlestick. Or a rectangular picture frame with a sculptural figurine.
Tip #5 - Layering
Layering your objects is key to making the items look interesting. What this means is that some objects need to overlap each other, such as a small vase being in front of a picture frame. This can also apply with books- you can add a stack of books with an item placed on top of them. You don't want to simply place a row of objects lined up perfectly in a row beside each other. Instead, have some of the items slightly in front of other items. However, keep in mind that there are always exceptions to the rule! It may turn out that one of your shelves looks great having a few items placed neatly beside each other in a row. The main point here is that some of your items on some of the shelves should be layered.
Tip #6- Visual weight
Keep in mind the “visual weight” of objects. You don’t want your top shelves to look heavier than your bottom shelves. For example, a large dark object will look heavier than a clear vase. If your top shelves are too “heavy”, your shelves will look top heavy and not balanced. This does not necessarily mean that only small objects can go on the top shelves. What this means is that you have to consider the overall visual weight of each shelf as a whole, and how that compares to the shelf above and below, and then determine if it looks balanced or too top-heavy.

Tuscany Renovation by Marianne Elizabeth Design
Tip #7- Buy more than you need
And lastly, we’ve learned through experience that you need to buy more than you think you need to get the best result! You’d be surprised how many accessories it takes to fill those shelves. Buy more items than you think you need (plus a little more than that), and then return what you don’t end up using! It’s much easier to style shelves when you have a bunch of items to play with. But this doesn’t necessarily mean you have to spend a ton! Don’t forget to “shop your home” and see what items you already have laying around or in storage that you can use. In addition, you can find great items at thrift stores!
Well I hope you enjoyed this how-to post and can incorporate some of these ideas into your own home! We had a blast designing this gorgeous living room!